Trabla: Install PivotX 2.3.11 Blog CMS on Windows ( XAMPP 5.6.21 )
PivotX is an open source blog software written in PHP
using either flat files or a database to store content.
It uses the Smarty web template system and the TinyMCE editor. One installation can handle several blogs, each with its own configuration, including themes. Users belong to different levels regarding managing and editing privileges. New functions can be added via extensions managed through the admin interface.
https://en.wikipedia.org/wiki/PivotX
Solving:
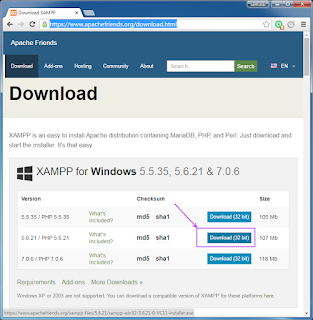
1. Download and install XAMPP 5.6.21 from official site:
https://www.apachefriends.org/download.html
2. Download PivotX 2.3.11 Blog CMS installer from official site:
http://pivotx.net/
3. Create folder \pivotx XAMPP htdocs folder
C:\xampp\htdocs\pivotx
and copy all files from downloaded PivotX 2.3.11 Blog CMS .zip source
4. Run XAMPP Control Panel
- open php.ini file ( Apache -> Config-> PHP(php.ini) )
and change value
from
max_execution_time=30
to
max_execution_time=120
+ save file.
- start Apache
- start Database
5. Open in browser following url to start PivotX 2.3.11 Blog CMS web installation
http://localhost/pivotx/pivotx/index.php
6. "Setup user" chapter
- type your user credentials
- scroll down
7. "Storage setup" - PivotX 2.3.11 Blog CMS support flat files or a database to store content.
In this tutorial we will use database as content storage.
So we need to create Database for PivotX 2.3.11 Blog CMS
1) Open phpMyAdmin in new browser tab (or window :) ) - http://localhost/phpmyadmin
2) Open SQL tab
3) Execute following query
CREATE DATABASE `pivotx`
DEFAULT CHARACTER SET utf8 COLLATE utf8_general_ci;
CREATE USER 'pivotx-owner'@'localhost';
CREATE USER 'pivotx-owner'@'127.0.0.1';
CREATE USER 'pivotx-owner'@'::1';
SET PASSWORD
FOR 'pivotx-owner'@'localhost' = PASSWORD('pivotx123$%');
SET PASSWORD
FOR 'pivotx-owner'@'127.0.0.1' = PASSWORD('pivotx123$%');
SET PASSWORD
FOR 'pivotx-owner'@'::1' = PASSWORD('pivotx123$%');
GRANT ALL PRIVILEGES ON
`pivotx`.* TO 'pivotx-owner'@'localhost' WITH GRANT OPTION;
GRANT ALL PRIVILEGES ON
`pivotx`.* TO 'pivotx-owner'@'127.0.0.1' WITH GRANT OPTION;
GRANT ALL PRIVILEGES ON
`pivotx`.* TO 'pivotx-owner'@'::1' WITH GRANT OPTION;
Go back to PivotX 2.3.11 Blog CMS installation page
- type Database Model - MySQL
- type Username - pivotx-owner
- type Password - pivotx123$%
- type Database Name- pivotx
- click "Continue" button
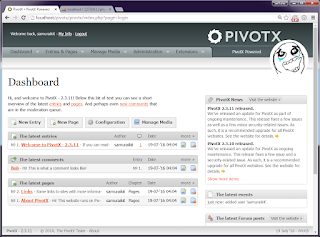
8. Installation done. Login As Admin to PivotX 2.3.11 Blog CMS Administrator Panel


No comments:
Post a Comment