Trabla: Install Moodle 3.1.1+ eLearning on Windows localhost ( XAMPP 5.6.23 )
Moodle is a free and open-source software learning ( e-learning ) management system written in PHP and distributed under the GNU General Public License. Developed on pedagogical principles,
Moodle is used for blended learning, distance education, flipped classroom and other e-learning projects in schools, universities, workplaces and other sectors.
With customizable management features, Moodle is used to create private websites with online courses for educators and trainers to achieve learning goals.
Moodle (acronym for modular object-oriented dynamic learning environment) allows for extending and tailoring learning environments using community sourced plugins
Latest Tutorial - Install Moodle 3.2.1 via Bitnami installer on Windows 7 localhost
Solving:
Watch on YouTube
1. Download and install XAMPP 5.6.23 from official site:
https://www.apachefriends.org/download.html
2. Download Moodle 3.1.1+ e-learning sources from official site:
https://moodle.org/
3. Create folder \moodle XAMPP htdocs folder
C:\xampp\htdocs\moodle
and copy all files from downloaded Moodle 3.1.1+ e-learning .zip source
4. Run XAMPP Control Panel
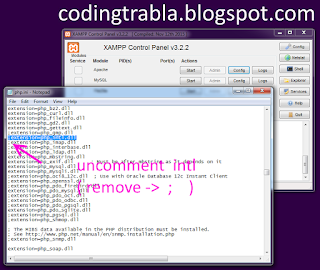
- open php.ini file ( Apache -> Config-> PHP(php.ini) )
- change max_execution_time value
from max_execution_time=30 to max_execution_time=600
- uncomment ( remove semicolon ) xmlrpc extension
from ;extension=php_xmlrpc.dll to extension=php_xmlrpc.dll
- uncomment ( remove semicolon ) soap extension
from ;extension=php_soap.dll to extension=php_soap.dll
- uncomment ( remove semicolon ) intl extension
from ;extension=php_intl.dll to extension=php_intl.dll
- uncomment ( remove semicolon ) opcache.enable and change value to 1
from ;opcache.enable=0 to opcache.enable=1
- add following string to end of file
zend_extension = "C:\xampp\php\ext\php_opcache.dll"
- save & close php.ini
- start Apache
- start Database
5. Open in browser following url to start Moodle 3.1.1+ e-learning web installation
http://localhost/moodle
"Choose language" page - click "Next" button
6. "Confirm Paths" page of Moodle 3.1.1+ e-learning web installation
- click "Next" button
7. "Choose database driver" page of Moodle 3.1.1+ e-learning web installation
- select Type - MariaDB (native/mariadb)
- click "Next" button
8. "Database settings" page of Moodle 3.1.1+ e-learning web installation
Now we need to create Database for Moodle 3.1.1+ e-learning
1) Open phpMyAdmin in new browser tab (or window :) ) - http://localhost/phpmyadmin
2) Open SQL tab
3) Execute following query
CREATE DATABASE `moodle`
DEFAULT CHARACTER SET utf8 COLLATE utf8_general_ci;
CREATE USER 'moodle-owner'@'localhost';
CREATE USER 'moodle-owner'@'127.0.0.1';
CREATE USER 'moodle-owner'@'::1';
SET PASSWORD
FOR 'moodle-owner'@'localhost' = PASSWORD('moodle123$%');
SET PASSWORD
FOR 'moodle-owner'@'127.0.0.1' = PASSWORD('moodle123$%');
SET PASSWORD
FOR 'moodle-owner'@'::1' = PASSWORD('moodle123$%');
GRANT ALL PRIVILEGES ON
`moodle`.* TO 'moodle-owner'@'localhost' WITH GRANT OPTION;
GRANT ALL PRIVILEGES ON
`moodle`.* TO 'moodle-owner'@'127.0.0.1' WITH GRANT OPTION;
GRANT ALL PRIVILEGES ON
`moodle`.* TO 'moodle-owner'@'::1' WITH GRANT OPTION;
Go back to Moodle 3.1.1+ e-learning installation page
- type Database name - moodle
- type Database user - moodle-owner
- type Database password- moodle123$%
- type Database port - 3306
- click "Next" button
9. "Copyright notice" page of Moodle 3.1.1+ e-learning web installation
- click "Continue" button
10. "Server checks" page of Moodle 3.1.1+ e-learning web installation
- make sure all green "OK" :)
- click "Continue" button
11. "Installation" page of Moodle 3.1.1+ e-learning web installation
- click "Continue" button
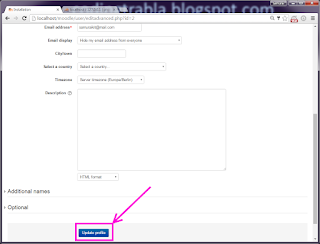
12. "Installation - admin credentials" page of Moodle 3.1.1+ e-learning web installation
- enter admin credentials
- click "Update profile" button
13. "Installation - front page settings" page of Moodle 3.1.1+ e-learning web installation
- set front page settings
- click "Save changes" button
Enjoy Moodle 3.1.1+ e-learning !!!


No comments:
Post a Comment