Vie Crypto Faucet and PTC
Showing posts with label XAMPP. Show all posts

Open .png image in Paint.Net from PHP script on Windows 10

Open .png image in Paint.Net from PHP script on Windows 10

tutorial open paint net image from php script

This tutorial will show you how to run paint.net image editing software from a php script. Paint.NET is image and photo editing software for PCs that run Windows. It features an intuitive and innovative user interface with support for layers, unlimited undo, special effects, and a wide variety of useful and powerful tools.

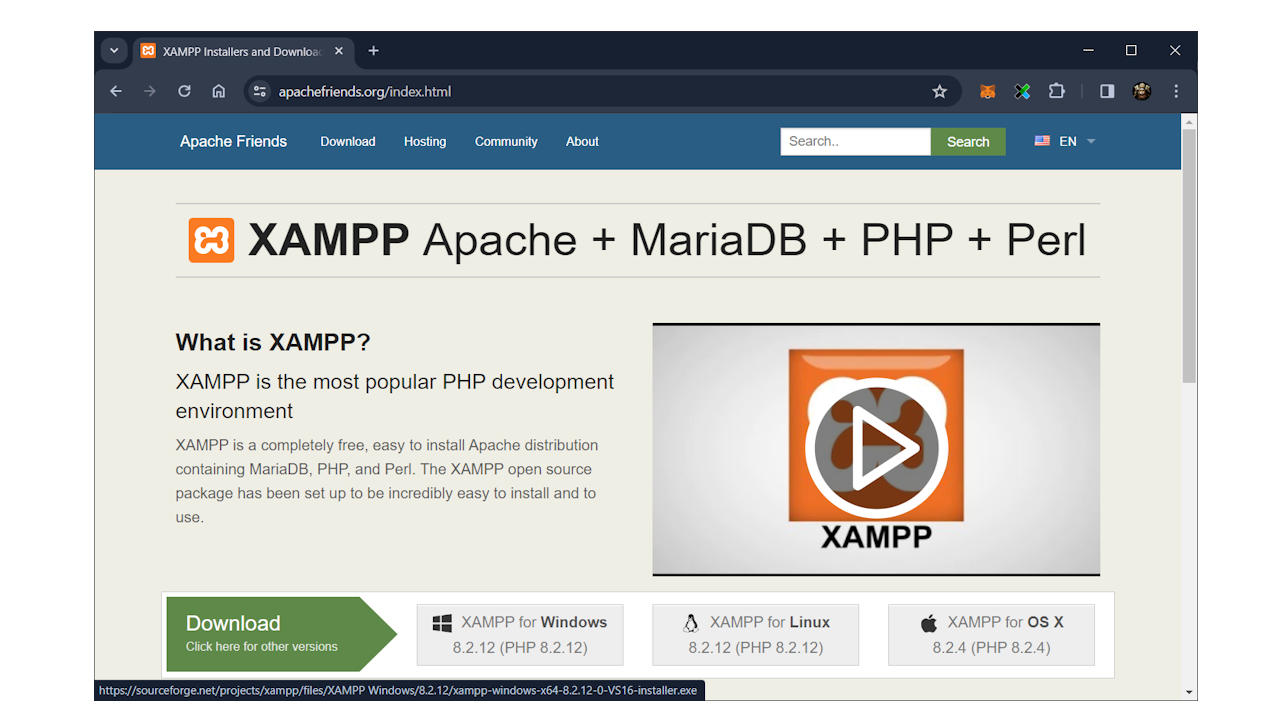
1. Install XAMPP with PHP for Windows

XAMPP is an easy to install free Apache distribution containing MariaDB, PHP and Perl. 

Goto official website, download and install it : 

https://www.apachefriends.org/index.html

2. Add PHP folder to Path Windows Environment Variable

In search bar type "env", click on "Edit the system environment variable" and "Open".


In "System properties" window click on "Environment Variables..." button in right bottom corner.
Than select "Path" environment variant and click "Edit" button.


Make sure path to PHP exists, if not - add it. For example on my computer :
C:\xampp\php

Save and close dialog windows.

3. Test PHP correct setup in Windows Command Prompt ( CMD)

Open Windows command prompt ( cmd ) 


Type following command and press Enter button on keyboard : 

php -version


4. Install Paint.Net for Windows

Download and install Pain.Net from afficial website.


5. Write PHP script to open image using Paint.Net protocol

Create file on Desktop. Name it automation.php.

Paste following code into php file :


<?php
   
    /**
     * Run script :
     *
     * CD C:\Users\Dev\Desktop
     * php automation.php
     */

    $MY_ANIME_IMAGE_PATH = "C:\Users\Dev\Desktop\Yumeko.png";

    openInPaintNet($MY_ANIME_IMAGE_PATH);

    function openInPaintNet( $pathToImage ){
        // Paint.Net protocol
        // https://www.getpaint.net/doc/latest/paintdotnetProtocol.html
        $cmd = "start paintdotnet:\"$pathToImage\"";
        exec($cmd);
    }

?>


Change path to your image !!!. I used Yumeko.png image on Desktop.


6. Run PHP script from Command Prompt ( CMD)

Open new window command prompt.

Type following command and press Enter ( change to your script path ! ):

CD C:\Users\Dev\Desktop

Type following command to run PHP script :

php automation.php

As result PHP should open Paint.Net with image you provided. 


Install ATutor LMS 2.2.3 on Windows 7 localhost via XAMPP 7.1.12 - opensource PHP e-learning

Trabla : Install ATutor LMS 2.2.3 on Windows 7 localhost  via XAMPP 7.1.12 - opensource PHP e-learning


Install ATutor LMS 2.2.3 on Windows 7 localhost  via XAMPP 7.1.12 - opensource PHP e-learning

ATutor is used in various contexts, including online course management, continuing professional development for teachers, career development, and academic research. The software is cited as unique for its accessibility features, (useful to visually impaired and disabled learners); and for its suitability for educational use according to software evaluation criteria established by The American Society for Training and Development (ASTD). ATutor is used internationally and has been translated into over fifteen languages with support for over forty additional language modules currently under development.


Solving:


Watch on YouTube

XAMPP : automatically run Apache + MySQL on PC startup

Trabla: XAMPP  - How to  automatically run Apache + MySQL on PC startup ( install windows services )


XAMPP : automatically run Apache + MySQL on PC startup

XAMPP  is a free and open source cross-platform web server solution stack package developed by Apache Friends, consisting mainly of the Apache HTTP Server, MariaDB database, and interpreters for scripts written in the PHP and Perl programming languages. XAMPP stands for Cross-Platform (X), Apache (A), MariaDB (M), PHP (P) and Perl (P). It is a simple, lightweight Apache distribution that makes it extremely easy for developers to create a local web server for testing and deployment purposes.

XAMPP Official Site - https://www.apachefriends.org/download.html

Solving:


Watch on YouTube

Install Thelia 2.3.4 open source ecommerce on Windows localhost via XAMPP 7.1.10

Trabla: Install Thelia 2.3.4 open source php Symfony ecommerce on Windows 7 localhost via XAMPP 7.1.10


Install Thelia 2.3.4 open source ecommerce on Windows localhost via XAMPP 7.1.10


Solving:


Steps:


1. Download and install xampp 7.1.10 
DO NOT START XAMPP Control Panel

2. Download Thelia 2.3.4 ecommerce source files

3. Unzip thelia archive

4. Create folder \thelia in c:\xampp\htdocs
e.g.  c:\xampp\htdocs\thelia

5. Copy all files from unzipped archive into c:\xampp\htdocs\thelia

6. Run xampp as administrator

7. Apache config changes httpd.conf

find
DocumentRoot "C:/xampp/htdocs"
<Directory "C:/xampp/htdocs">

change to
DocumentRoot "C:/xampp/htdocs/thelia/web"
<Directory "C:/xampp/htdocs/thelia/web">

save and close 

8. php.ini changes

find max_execution_time=30
change to max_execution_time=1200

find  memory_limit=128M
change to  memory_limit=512M

find max_input_time=60
change to max_input_time=600

find post_max_size=8M
change to post_max_size=20M

find ;extension=php_intl.dll
change to ( remove semicolon ; ) extension=php_intl.dll

save and close

9. Start Apache and MySQL

10. In browser goto http://localhost/phpmyadmin
click on SQL tab and copy / paste following SQL to create DB and user for Thelia

CREATE DATABASE `thelia` 
DEFAULT CHARACTER SET utf8 COLLATE utf8_general_ci;

CREATE USER 'thelia-owner'@'localhost'; 
CREATE USER 'thelia-owner'@'127.0.0.1';
CREATE USER 'thelia-owner'@'::1';

SET PASSWORD FOR 'thelia-owner'@'localhost' = PASSWORD('thelia123');
SET PASSWORD FOR 'thelia-owner'@'127.0.0.1' = PASSWORD('thelia123');
SET PASSWORD FOR 'thelia-owner'@'::1' = PASSWORD('thelia123');


GRANT ALL PRIVILEGES ON `thelia`.* TO 'thelia-owner'@'localhost' WITH GRANT OPTION;
GRANT ALL PRIVILEGES ON `thelia`.* TO 'thelia-owner'@'127.0.0.1' WITH GRANT OPTION;
GRANT ALL PRIVILEGES ON `thelia`.* TO 'thelia-owner'@'::1' WITH GRANT OPTION;

click "Go" button

11. In browser goto http://localhost  and go throw Thelia web installation wizard

For DB connection use
host : localhost
username : thelia-owner
password : thelia123

choose database : thelia

Enjoy !!! Thelia 2.3.4 ecommerce !!!


Install Shopware 5.3.3 community edition opensource ecommerce via Bitnami on Windows

Trabla:  Install Shopware 5.3.3 community edition php opensource ecommerce shop platform via Bitnami installer on Windows 7 localhost


Install Shopware 5.3.3 community edition opensource ecommerce via Bitnami on Windows


Solving:


Install Piwik 3.1.1 Analytics Platform on Windows 7 localhost via XAMPP 7.0.23 ( php7 )

Trabla: Install Piwik 3.1.1 Analytics Platform  on Windows 7 localhost via XAMPP 7.0.23 ( php7 )

Install Piwik 3.1.1 Analytics Platform on Windows 7 localhost via XAMPP 7.0.23 ( php7 )


Piwik is a free and open source web analytics application written by a team of international developers that runs on a PHP/MySQL webserver. Piwik tracks online visits to one or more websites and displays reports on these visits for analysis. As of July 2017, Piwik was used by over 1,000,000 websites, or 1.3% of all websites, and has been translated to 54 languages.
Piwik displays reports regarding the geographic location of visits, the source of visits (i.e. whether they came from a website, directly, or something else), the technical capabilities of visitors (browser, screen size, operating system, etc.), what the visitors did (pages they viewed, actions they took, how they left), the time of visits and more.

Piwik Analytics Platform Official Site - https://piwik.org

Solving:


Watch on YouTube


1. Download and install XAMPP 7.0.23 with PHP7 from
official site: https://www.apachefriends.org/index.html

ATTENTION: NOT Work with XAMPP 7.1.9 !!!

Install Piwik 3.1.1 Analytics on Windows 7 localhost via XAMPP php7 tutorial 1

Install Piwik 3.1.1 Analytics on Windows 7 localhost via XAMPP php7 tutorial 2


Install Piwik 3.1.1 Analytics on Windows 7 localhost via XAMPP php7 tutorial 3

Install Piwik 3.1.1 Analytics on Windows 7 localhost via XAMPP php7 tutorial 4

Install Piwik 3.1.1 Analytics on Windows 7 localhost via XAMPP php7 tutorial 5

Install Piwik 3.1.1 Analytics on Windows 7 localhost via XAMPP php7 tutorial 6


2. Download Piwik 3.1.1 Web / Mobile Analytics Platform  source files
from official site: https://piwik.org/

Install Piwik 3.1.1 Analytics on Windows 7 localhost via XAMPP php7 tutorial 7

Install Piwik 3.1.1 Analytics on Windows 7 localhost via XAMPP php7 tutorial 8


3. Create folder \piwik in XAMPP  \htdocs folder

e.g. C:\xampp\htdocs\piwik

Install Piwik 3.1.1 Analytics on Windows 7 localhost via XAMPP php7 tutorial 9

Install Piwik 3.1.1 Analytics on Windows 7 localhost via XAMPP php7 tutorial 10

Install Piwik 3.1.1 Analytics on Windows 7 localhost via XAMPP php7 tutorial 11


4. Copy files from Piwik archive ( folder \piwik in archive ) into ...\htdocs\piwik folder

e.g. C:\xampp\htdocs\piwik

Install Piwik 3.1.1 Analytics on Windows 7 localhost via XAMPP php7 tutorial 12

Install Piwik 3.1.1 Analytics on Windows 7 localhost via XAMPP php7 tutorial 13


5. Run XAMPP

- start Apache
- start MySQL

Install Piwik 3.1.1 Analytics on Windows 7 localhost via XAMPP php7 tutorial 14

Install Piwik 3.1.1 Analytics on Windows 7 localhost via XAMPP php7 tutorial 15


6. Open browser and goto url  to start Piwik web installer

http://localhost/piwik/

Install Piwik 3.1.1 Analytics on Windows 7 localhost via XAMPP php7 tutorial 16

- click "Next" button

7. "System Check" page of  Piwik web installer

- scroll down

Install Piwik 3.1.1 Analytics on Windows 7 localhost via XAMPP php7 tutorial 17

- scroll down

Install Piwik 3.1.1 Analytics on Windows 7 localhost via XAMPP php7 tutorial 18


- click "Next" button

Install Piwik 3.1.1 Analytics on Windows 7 localhost via XAMPP php7 tutorial 19


7. "Database Setup" page of Piwik web installer

Install Piwik 3.1.1 Analytics on Windows 7 localhost via XAMPP php7 tutorial 20

To continue we need to create database for Piwik in phpMyAdmin ( pre-installed in XAMPP )

- open new tab in browser and goto url

http://localhost/phpmyadmin

Install Piwik 3.1.1 Analytics on Windows 7 localhost via XAMPP php7 tutorial 21

- click on "SQL" tab in phpMyAdmin menu

Install Piwik 3.1.1 Analytics on Windows 7 localhost via XAMPP php7 tutorial 22

Install Piwik 3.1.1 Analytics on Windows 7 localhost via XAMPP php7 tutorial 23

- copy following SQL script  to create database and user for Piwik
into Query text area in phpMyAdmin

CREATE DATABASE `piwik` 
DEFAULT CHARACTER SET utf8 COLLATE utf8_general_ci;

CREATE USER 'piwik-owner'@'localhost'; 
CREATE USER 'piwik-owner'@'127.0.0.1';
CREATE USER 'piwik-owner'@'::1';

SET PASSWORD FOR 'piwik-owner'@'localhost' = PASSWORD('piwik123$%');
SET PASSWORD FOR 'piwik-owner'@'127.0.0.1' = PASSWORD('piwik123$%');
SET PASSWORD FOR 'piwik-owner'@'::1' = PASSWORD('piwik123$%');


GRANT ALL PRIVILEGES ON `piwik`.* TO 'piwik-owner'@'localhost' WITH GRANT OPTION;
GRANT ALL PRIVILEGES ON `piwik`.* TO 'piwik-owner'@'127.0.0.1' WITH GRANT OPTION;
GRANT ALL PRIVILEGES ON `piwik`.* TO 'piwik-owner'@'::1' WITH GRANT OPTION;


- click "Go" button

Install Piwik 3.1.1 Analytics on Windows 7 localhost via XAMPP php7 tutorial 24


- result of script execution

Install Piwik 3.1.1 Analytics on Windows 7 localhost via XAMPP php7 tutorial 25


- return to Piwik Database Setup page
enter database connection parameters

Install Piwik 3.1.1 Analytics on Windows 7 localhost via XAMPP php7 tutorial 26


8. "Creating the Tables" page of Piwik web installation

- click "Next" button

Install Piwik 3.1.1 Analytics on Windows 7 localhost via XAMPP php7 tutorial 27


9. "Super User" page of Piwik web installer

- enter Super User data and click "Next" button

Install Piwik 3.1.1 Analytics on Windows 7 localhost via XAMPP php7 tutorial 28


10. "Setup a Website" page of Piwik web installer

Install Piwik 3.1.1 Analytics on Windows 7 localhost via XAMPP php7 tutorial 29

To continue installation let's create single page site on localhost

- create folder \mysite in \htdocs folder

e.g. C:\xampp\htdocs\mysite\

Install Piwik 3.1.1 Analytics on Windows 7 localhost via XAMPP php7 tutorial 30

Install Piwik 3.1.1 Analytics on Windows 7 localhost via XAMPP php7 tutorial 31


- create new text file in \mysite folder

Install Piwik 3.1.1 Analytics on Windows 7 localhost via XAMPP php7 tutorial 32

- rename text file to index.html

Install Piwik 3.1.1 Analytics on Windows 7 localhost via XAMPP php7 tutorial 33

Install Piwik 3.1.1 Analytics on Windows 7 localhost via XAMPP php7 tutorial 34


- edit index.html and put this simple html

Install Piwik 3.1.1 Analytics on Windows 7 localhost via XAMPP php7 tutorial 35


<html>

<head>

</head>

<body>
<h1>Wellcome to MySite !!!</h1>
</body>

</html>

Install Piwik 3.1.1 Analytics on Windows 7 localhost via XAMPP php7 tutorial 36

- in new browser tab goto http://localhost/mysite/ to check our simple site

Install Piwik 3.1.1 Analytics on Windows 7 localhost via XAMPP php7 tutorial 37

- back to "Setup Website" page of Piwik installer
type data as on screenshot and click "Next" button

Install Piwik 3.1.1 Analytics on Windows 7 localhost via XAMPP php7 tutorial 38

11. "Tracking code" page of Piwik web installer

Install Piwik 3.1.1 Analytics on Windows 7 localhost via XAMPP php7 tutorial 39

- copy tracking code for My Site

Install Piwik 3.1.1 Analytics on Windows 7 localhost via XAMPP php7 tutorial 40

- paste tracking code between <heade> </head> tags in index.html of My Site
+ save file

Install Piwik 3.1.1 Analytics on Windows 7 localhost via XAMPP php7 tutorial 41

Install Piwik 3.1.1 Analytics on Windows 7 localhost via XAMPP php7 tutorial 42

- scroll down  "Tracking code" page of Piwik web installer and click "Next" button

Install Piwik 3.1.1 Analytics on Windows 7 localhost via XAMPP php7 tutorial 43


12. "Congratulations" page of Piwik web installation

- click "Continue to Piwik" button

Install Piwik 3.1.1 Analytics on Windows 7 localhost via XAMPP php7 tutorial 44

Install Piwik 3.1.1 Analytics on Windows 7 localhost via XAMPP php7 tutorial 45


13. Sign in into Piwik

Install Piwik 3.1.1 Analytics on Windows 7 localhost via XAMPP php7 tutorial 46

Install Piwik 3.1.1 Analytics on Windows 7 localhost via XAMPP php7 tutorial 47


14. Open in different browsers http://localhost/mysite and see how Piwik shows stats

Install Piwik 3.1.1 Analytics on Windows 7 localhost via XAMPP php7 tutorial 48


Superb !!! Enjoy  Piwik 3.1.1 Analytics Platform !!!