Trabla: Install InvoiceNinja on windows (via bitnami installer )
InvoiceNinja is a powerful open source solution for creating invoices and accepting payments from clients online. Built-in templates, integration with payment gateways, multi-currency support and a simple and intuitive interface make InvoiceNinja the perfect tool for small business invoicing.
Solving:
1. Download Bitnami InvoiceNinja windows installer from official site:
https://bitnami.com/stack/invoice-ninja/installer
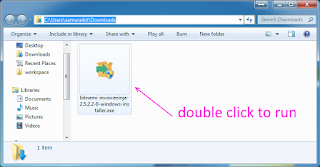
Double click to run Bitnami InvoiceNinja installer
2. Click "Yes"
3. "Welcome" screen click "Next"
4. "Select components" screen - click "Next"
5. "Installation Folder" screen - leave default folder and click "Next" button
6. "Create Admin account" screen
Enter your data into fields and press "Next" button
7. "Web Server Port" screen
Change default port from 80 to 81.
Very often this port is already used by another app like Skype.
Click "Next" button.
8."Web Server Port - SSL Port "screen
Change default port from 443 to 444.
9. "Invoice Ninja Site" screen - press "Next" button
10. "Configure SMTP settings" screen - enable GMAIL if you need,
press "Next" button.
11. "Bitnami Cloud hosting" screen
- disable checkbox "Learn more ..."
- press "Next" button
12. "Ready to Install" screen - press "Next" button
13. Installing ...
14. "Completing Bitnami Invoice Ninja ... installation" screen - click "Finish" button
Browser and bitnami console will be started automaticaly
Click "Access Invoice Ninja" link in browser
Hooray !!!


No comments:
Post a Comment