Showing posts with label CMS. Show all posts

Install Plone CMS 5.0.8 on Windows localhost - opensource Python CMS / WCM

Trabla : Install Plone CMS 5.0.8 on Windows localhost - opensource Python CMS / WCM

Install Plone CMS 5.0.8  on Windows localhost - opensource Python CMS / WCM

Plone is a free and open source content management system built on top of the Zope application server. Plone is positioned as an "Enterprise CMS" and is commonly used for intranets and as part of the web presence of large organizations. High-profile public sector users include the U.S. Federal Bureau of Investigation, Brazilian Government, United Nations, City of Bern (Switzerland), New South Wales Government (Australia), and European Environment Agency. Plone's proponents cite its security track record and its accessibility as reasons to choose Plone.

Plone CMS Official Wedsite - https://plone.org/

Solving:


Watch on YouTube

1. Download and install Python 2.7.14 from
  !!! Attention : enable "Add pyton.exe to Path"
  https://www.python.org/downloads/


2. Download & install Microsoft Visual C++ Compiler for Python 2.7
  https://www.microsoft.com/en-us/download/details.aspx?id=44266

3. Download simple-plone-buildout zip archive from
  https://github.com/plone/simple-plone-buildout

4. Create folder C:\plonecms

5. Create folder  C:\plonecms\buildout

6. Unzip simple-plone-buildout archive

7. Copy files from archive into  C:\plonecms\buildout

8. Run CMD

9. Execute folowing commands in CMD

         CD C:\plonecms
         pip install virtualenv
         CD C:\plonecms\buildout
         COPY profiles\buildout.cfg.tmpl buildout.cfg
         virtualenv env
         env\Scripts\pip install -r requirements.txt
         env\Scripts\buildout
         bin\instance fg

10. Open browser, goto http://localhost:8080
Login / password = admin / admin


Install Mezzanine on Windows localhost - opensource Python CMS

Trabla : Install Mezzanine on Windows localhost - opensource Python CMS

Install Mezzanine on Windows localhost - opensource Python CMS

Mezzanine is a powerful, consistent, and flexible content management platform. Built using the Django framework, Mezzanine provides a simple yet highly extensible architecture that encourages diving in and hacking on the code. Mezzanine is BSD licensed and supported by a diverse and active community.

Mezzanine CMS Official Site - http://mezzanine.jupo.org/


Solving:


Watch on YouTube

Install Ionize CMS 1.0.8 on Windows 7 localhost via XAMPP 5.6.32 - opensource PHP CMS

Trabla : Install Ionize CMS 1.0.8 on Windows 7 localhost via XAMPP 5.6.32 - opensource PHP CMS ( content management system )


Install Ionize CMS 1.0.8 on Windows 7 localhost via XAMPP 5.6.32 - opensource PHP CMS

Ionize is a free multilingual Content Management System based on CodeIgniter written in PHP. It was developed by a group of webdesigners and is aimed to be highly flexible and modular, yet easy to use for end users. It requires a working Apache and MySQL installation.

Ionize CMS Official Site - http://ionizecms.com/


Solving:


Watch on YouTube

Install KeystoneJS 0.3.17 on Windows localhost - Node.js CMS & application platform

Trabla: Install KeystoneJS 0.3.17 on Windows localhost - Node.js CMS & application platform ( Node.js + MongoDB + Yeoman Generator )


Install KeystoneJS 0.3.17 on Windows localhost - Node.js CMS & application platform

KeystoneJS is a powerful Node.js content management system and web app framework built on express and mongoose. Keystone makes it easy to create sophisticated web sites and apps, and comes with a beautiful auto-generated Admin UI.

KeystoneJS Official Site - http://keystonejs.com/

Solving:


Steps:


1. Download and install Node.js

2. Download and install MondoDB - Windows Server 2008 64-bit without SSL support x64

3. Run Mongo DB
 - Create folder C:\mongo-db-data
 - Run CMD as Administrator
 - Find path to MongoDB \bin folder
 - Execute in CMD command : CD C:\Program Files\MongoDB\Server\3.4\bin
 - Execute in CMD command :  mongod --dbpath C:\mongo-db-data
DO NOT CLOSE CMD !!! MongoDB is running

4. Install KeystoneJS
- Run CMD as Administrator ( 2nd CMD window )
- Execute in CMD command : npm install -g generator-keystone
- Execute in CMD command : mkdir C:\my-test-project
- Execute in CMD command : CD C:\my-test-project
- Execute in CMD command : yo keystone
- Execute in CMD command : node keystone

5. In browser goto url: http://localhost:3000 

By default KeystoneJS uses MongoDB running on localhost so no DB config is needed

Hooray !!! Enjoy KeystoneJS  Node.js content maangement system ( CMS ) and app platform !!!


Install Contao 4.4.7 opensource PHP CMS on Windows 7 localhost

Trabla: Install Contao 4.4.7 opensource PHP CMS on Windows 7 localhost via XAMPP 7.1.10


Install Contao 4.4.7 opensource PHP CMS on Windows 7 localhost

Solving:


Install Textpattern 4.6.2 on Windows 7 localhost via XAMPP 7.0.23 - opensource php CMS

Trabla: Install Textpattern 4.6.2 on Windows 7 localhost via XAMPP 7.0.23 - opensource php CMS


Install Textpattern 4.6.2 on Windows 7 localhost via XAMPP 7.0.23 - opensource php CMS


Textpattern CMS is completely free, open source software and it's built upon proven web technologies too. Furthermore, it doesn’t muddy your HTML with additional code dependencies or script libraries.
Textpattern has a powerful tag-based template language that’s easy to learn and provides a wealth of ways to structure a website and manipulate content.
Textpattern is open source under the GNU General Public License v2.0, and all development takes place on GitHub. User contributions are welcome (and indeed, are enthusiastically encouraged).

Textpattern CMS Official Site - https://textpattern.com/


Solving


Watch on YouTube


SQL script to create database and database user for Textpattern CMS 4.6.2

CREATE DATABASE `textpattern` 
DEFAULT CHARACTER SET utf8 COLLATE utf8_general_ci;

CREATE USER 'textpattern-owner'@'localhost'; 
CREATE USER 'textpattern-owner'@'127.0.0.1';
CREATE USER 'textpattern-owner'@'::1';

SET PASSWORD FOR 'textpattern-owner'@'localhost' = PASSWORD('textpattern123$%');
SET PASSWORD FOR 'textpattern-owner'@'127.0.0.1' = PASSWORD('textpattern123$%');
SET PASSWORD FOR 'textpattern-owner'@'::1' = PASSWORD('textpattern123$%');


GRANT ALL PRIVILEGES ON `textpattern`.* TO 'textpattern-owner'@'localhost' WITH GRANT OPTION;
GRANT ALL PRIVILEGES ON `textpattern`.* TO 'textpattern-owner'@'127.0.0.1' WITH GRANT OPTION;
GRANT ALL PRIVILEGES ON `textpattern`.* TO 'textpattern-owner'@'::1' WITH GRANT OPTION;

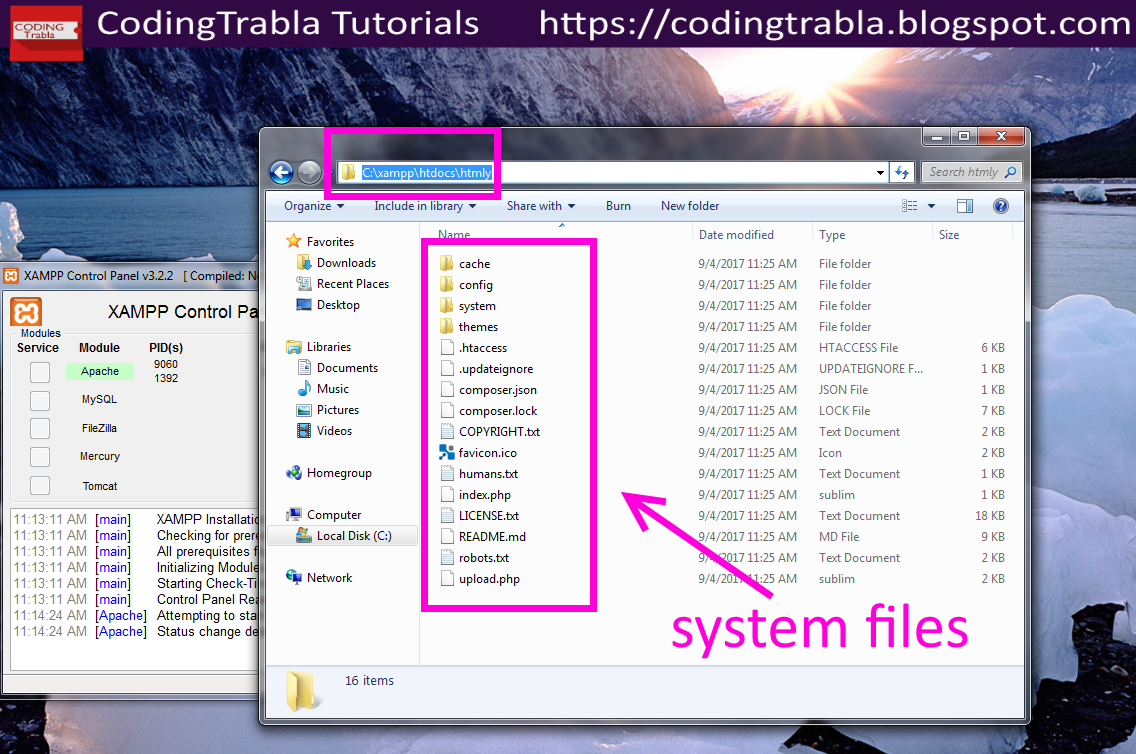
Install ForkCMS 5.0.4 on Windows 7 localhost via XAMPP 7.1.8 and composer - opensource PHP CMS

Trabla: Install ForkCMS 5.0.4 on Windows 7 localhost via XAMPP 7.1.8 and composer - opensource PHP CMS

Install ForkCMS 5.0.4 on Windows 7 localhost via XAMPP 7.1.8 and composer - opensource PHP CMS


Fork is an easy to use open source CMS using Symfony Components.

Fork CMS Official Site - http://www.fork-cms.com/


Solving:


Install HTMLy 2.7.4 flat-file CMS / Blog on Win7 localhost via XAMPP ( PHP7 )

Trabla: Install HTMLy 2.7.4 flat-file Content Management System ( CMS ) / Blog on Windows 7 localhost via XAMPP ( PHP7 )

Install HTMLy 2.7.4 flat-file CMS / Blog on Win7 localhost via XAMPP ( PHP7 )


HTMLy is an open source Databaseless Blogging Platform or Flat-File Blog prioritizes simplicity and speed written in PHP. HTMLy can be referred to as Flat-File CMS either since it will also manage your content. HTMLy uses a unique algorithm to find or list any content based on date, type, category, tag, or author, and the performance will remain fast even if we have thousands of posts and hundreds of tags. As a flat-file blog or flat-file CMS , HTMLy designed to run smoothly despite using minimal server specs. With 512MB of RAM or even less, it should can handle more than 10K posts without any issues.

HTMLy Official Site - https://www.htmly.com/


Solving:


Watch on YouTube


1. Download and install XAMPP 7.1.8 ( PHP7 )
from official site: https://www.apachefriends.org/index.html

Install HTMLy 2.7.4 flat-file CMS / Blog on Win7 localhost via XAMPP ( PHP7 ) 1

Install HTMLy 2.7.4 flat-file CMS / Blog on Win7 localhost via XAMPP ( PHP7 ) 2

Install HTMLy 2.7.4 flat-file CMS / Blog on Win7 localhost via XAMPP ( PHP7 ) 3

Install HTMLy 2.7.4 flat-file CMS / Blog on Win7 localhost via XAMPP ( PHP7 ) 4

Install HTMLy 2.7.4 flat-file CMS / Blog on Win7 localhost via XAMPP ( PHP7 ) 5

2. Download HTMLy 2.7.4 CMS / Blog  installer.php from official site:

- open browser, goto https://www.htmly.com/

- click on "DOWNLOAD" link in site menu

Install HTMLy 2.7.4 flat-file CMS / Blog on Win7 localhost via XAMPP ( PHP7 ) 6

- click on "installer.php"

Install HTMLy 2.7.4 flat-file CMS / Blog on Win7 localhost via XAMPP ( PHP7 ) 7

Install HTMLy 2.7.4 flat-file CMS / Blog on Win7 localhost via XAMPP ( PHP7 ) 8


3.  Create folder /htmly in XAMPP /htdocs folder ( C:\xampp\htdocs )

Install HTMLy 2.7.4 flat-file CMS / Blog on Win7 localhost via XAMPP ( PHP7 ) 9


4. Copy HTMLy 2.7.4 CMS / Blog  installer.php into /htmly folder
( C:\xampp\htdocs\htmly )

Install HTMLy 2.7.4 flat-file CMS / Blog on Win7 localhost via XAMPP ( PHP7 ) 10

Install HTMLy 2.7.4 flat-file CMS / Blog on Win7 localhost via XAMPP ( PHP7 ) 11


5. Run XAMPP Control Panel

- start Apache server


Install HTMLy 2.7.4 flat-file CMS / Blog on Win7 localhost via XAMPP ( PHP7 ) 12


6. Run HTMLy 2.7.4 CMS / Blog   web-installer:

- open browser
- goto page  https://localhost/htmly/installer.php

Install HTMLy 2.7.4 flat-file CMS / Blog on Win7 localhost via XAMPP ( PHP7 ) 13


- type your data and click "Install via Tool"

Install HTMLy 2.7.4 flat-file CMS / Blog on Win7 localhost via XAMPP ( PHP7 ) 14


Hooray !!!

Install HTMLy 2.7.4 flat-file CMS / Blog on Win7 localhost via XAMPP ( PHP7 ) 15


7. Check /htmly folder - files of system should appear

Install HTMLy 2.7.4 flat-file CMS / Blog on Win7 localhost via XAMPP ( PHP7 ) 16


Hooray!!! Enjoy HTMLy  2.7.4 CMS  / Blog !!!

Admin Login Url : http://localhost/htmly/login

Install HTMLy 2.7.4 flat-file CMS / Blog on Win7 localhost via XAMPP ( PHP7 ) 17

Blog Url : http://localhost/htmly


Install HTMLy 2.7.4 flat-file CMS / Blog on Win7 localhost via XAMPP ( PHP7 ) 18


Install Pico 1.0.6 CMS ( flat-file, no DB ) on Windows 7 localhost via XAMPP 7.1.8 ( PHP 7 )

Trabla: Install Pico 1.0.6 CMS ( flat-file, no DB ) on Windows 7 localhost via XAMPP 7.1.8 ( PHP 7 )


Install Pico 1.0.6 CMS ( flat-file, no DB ) on Windows 7 localhost via XAMPP 7.1.8 ( PHP 7 )

Pico is a stupidly simple, blazing fast, flat file CMS. That’s definitely a mouthful, what does it even mean? In the most basic sense, it means that there is no administration backend or database to deal with. You simply create markdown files in the content folder and those files become your pages. There’s much more to Pico than that though.
Let’s get this out of the way: Pico is not a turn-key solution. Pico trades one-click setups and complex management interfaces for blazing speed, flexibility, and a lightweight footprint. If a little bit of reading and some basic configuration sounds like too much then Pico is probably not for you.
That being said, Pico is incredibly extendable and customizable. With a very small amount of configuration, you’ll find yourself with a very personalized experience. There’s also a growing community creating ready-to-go themes and plugins for Pico. It is very possible to get started with Pico even with no prior knowledge of HTML. You’ll find however that a little bit of coding knowledge will get you a long way.

Pico CMS Official Site - http://picocms.org


Solving:


Watch on YouTube


1. Download and install XAMPP 7.1.8 ( with PHP 7 )
from official site - https://www.apachefriends.org/index.html

Install Pico 1.0.6 PHP CMS ( flat-file, noDB ) on Windows tutorial 1


Install Pico 1.0.6 PHP CMS ( flat-file, noDB ) on Windows tutorial 2

Install Pico 1.0.6 PHP CMS ( flat-file, noDB ) on Windows tutorial 3

Install Pico 1.0.6 PHP CMS ( flat-file, noDB ) on Windows tutorial 4

Install Pico 1.0.6 PHP CMS ( flat-file, noDB ) on Windows tutorial 5


Install Pico 1.0.6 PHP CMS ( flat-file, noDB ) on Windows tutorial 6

2. Download Pico 1.0.6 flat-file CMS  source code

- goto Pico CMS official site : http://picocms.org/

- click on "Download Now" button

Install Pico 1.0.6 PHP CMS ( flat-file, noDB ) on Windows tutorial 7

- click on "Download Pico 1.0.6"

Install Pico 1.0.6 PHP CMS ( flat-file, noDB ) on Windows tutorial 8

- click on link pico-release-v1.0.6.tar.gz

Install Pico 1.0.6 PHP CMS ( flat-file, noDB ) on Windows tutorial 9

Install Pico 1.0.6 PHP CMS ( flat-file, noDB ) on Windows tutorial 10

3. Unzip Pico 1.0.6 CMS archive using 7zip application

- open archive via 7zip

Install Pico 1.0.6 PHP CMS ( flat-file, noDB ) on Windows tutorial 11

- in 7zip application double-click on pico-release-v1.0.6.tar

Install Pico 1.0.6 PHP CMS ( flat-file, noDB ) on Windows tutorial 12

- in 7zip application click on "Extract" button

Install Pico 1.0.6 PHP CMS ( flat-file, noDB ) on Windows tutorial 13

- in dialog type folder name pico
and click OK button

Install Pico 1.0.6 PHP CMS ( flat-file, noDB ) on Windows tutorial 14

- Extracting ... please wait

Install Pico 1.0.6 PHP CMS ( flat-file, noDB ) on Windows tutorial 15

- Result - folder /pico with files

Install Pico 1.0.6 PHP CMS ( flat-file, noDB ) on Windows tutorial 15

Install Pico 1.0.6 PHP CMS ( flat-file, noDB ) on Windows tutorial 16


4. Copy /pico folder  into xampp /htdocs folder ( C:\xampp\htdocs )

Install Pico 1.0.6 PHP CMS ( flat-file, noDB ) on Windows tutorial 17

5. Run XAMPP Control Panel

- start Apache 

Install Pico 1.0.6 PHP CMS ( flat-file, noDB ) on Windows tutorial 18

Install Pico 1.0.6 PHP CMS ( flat-file, noDB ) on Windows tutorial 19


6. Open Pico CMS in browser

- open browser
- goto http://localhost/pico

Install Pico 1.0.6 PHP CMS ( flat-file, noDB ) on Windows tutorial 20
Hooray !!! It's alive !!!

7. Now let's add new page into Pico CMS

- create file helloworld.md  in directory C:\xampp\htdocs\pico\content-sample\sub

Install Pico 1.0.6 PHP CMS ( flat-file, noDB ) on Windows tutorial 21


- open file helloworld.md and copy following text ( using any text editor )

Install Pico 1.0.6 PHP CMS ( flat-file, noDB ) on Windows tutorial 22

---
Title: Hello World !!! :)
---

## This is a HelloWorld Page

HelloWorld CodingTrabla Tutorials :)

Install Pico 1.0.6 PHP CMS ( flat-file, noDB ) on Windows tutorial 23

 - save file
Install Pico 1.0.6 PHP CMS ( flat-file, noDB ) on Windows tutorial 24


- reload Pico CMS page in browser

Install Pico 1.0.6 PHP CMS ( flat-file, noDB ) on Windows tutorial 25

Install Pico 1.0.6 PHP CMS ( flat-file, noDB ) on Windows tutorial 26

Install Pico 1.0.6 PHP CMS ( flat-file, noDB ) on Windows tutorial 27


Hooray !!! Enjoy Pico 1.0.6 Flat-File Content Management System ( CMS ) !!!